Wiring... Oh what fun! :)

This forum contains discussions about all things Knight Rider.

Moderators: neps, Matthew, Michael Pajaro

Post Reply
User avatar
RafaelLOJ
Operative
Posts: 150
Joined: Thu Jun 26, 2008 10:25 am

Wiring... Oh what fun! :)

Post by RafaelLOJ » Fri Dec 26, 2014 10:25 pm

Mechanically, my car is pretty good, so been using time off during the holidaze to work on wiring...
I had a custom CNC aluminum plate made then powdercoated to house my center console buttons...I had rewired it up for lights today, previously using 16 gauge primary wire, but it was thick and hard to bend... So being the lights only use up about 4 amps, I used 18 gauge speaker wire (it's inside and being it has more strands and electricity is carried on the outside of it, it works out good)...

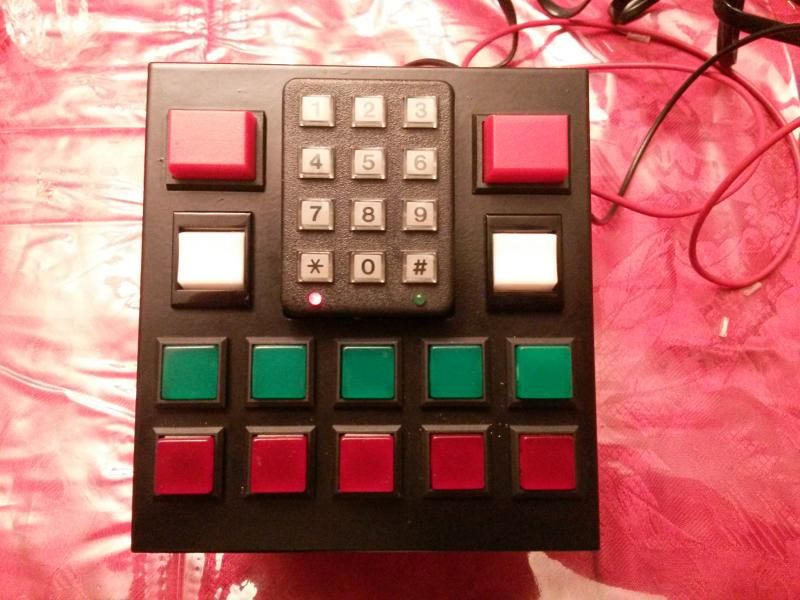
Here is a non lit pic...
Image

Top left Red Button is Ignition On / Off... Once pressed, ALL the lights, including the keypad turn on...
After entering the right code, you can use the Top Right button to start the engine...
2 White rockers are for Windows...
And the 10 red / green for lights, trunk, etc...
Here is a lit picture, kinda washed out, but bright and beautiful in person...
More pics as I get more work done....

Image

aussie muscle
Recruit
Posts: 36
Joined: Tue Jun 02, 2009 5:38 am
antispam: No
What year did the original Knight Rider start: 1982

Re: Wiring... Oh what fun! :)

Post by aussie muscle » Sun Dec 28, 2014 6:27 pm

it's cool not only do they light, but also do things

User avatar
RafaelLOJ
Operative
Posts: 150
Joined: Thu Jun 26, 2008 10:25 am

Re: Wiring... Oh what fun! :)

Post by RafaelLOJ » Sun Dec 28, 2014 8:01 pm

A few reasons why I went this route...
I have a 91 Formula with different console...
I picked up a pristine console (for a 91) for a great price...
I have a stick shift car and want access to my Emergency Brake...
So I will make a small angled stand for it to mimic the real one, but can't cover up my ebrake...

User avatar
RafaelLOJ
Operative
Posts: 150
Joined: Thu Jun 26, 2008 10:25 am

Re: Wiring... Oh what fun! :)

Post by RafaelLOJ » Tue Dec 30, 2014 12:01 pm

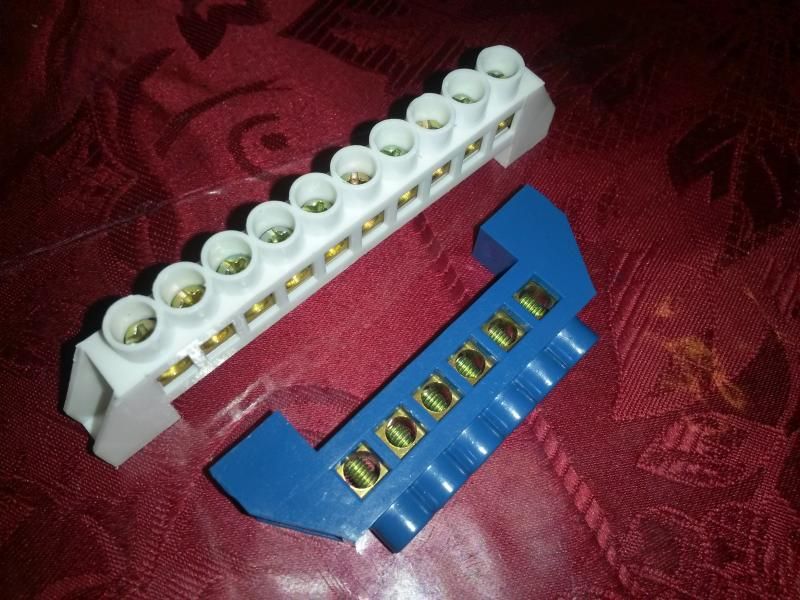
Terminal Blocks...
I got these 2 sizes from Ebay...
The white one can handle 40 amps (11 Inputs) and the blue 30 amps (6 inputs)...
Image

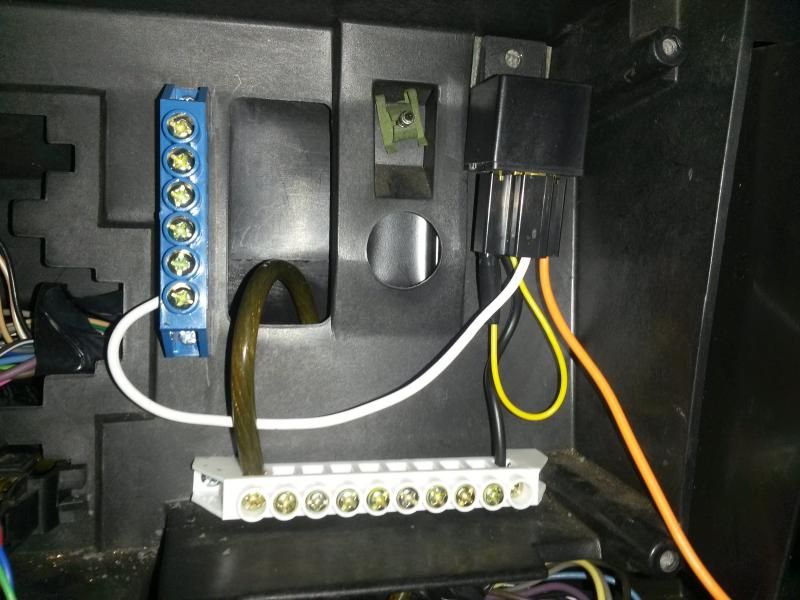
I used the white for 12v + (can be used for grounds too), I have 8 Gauge 12v+ running to one of the inputs, then you I will run various things to it... Brennon's 55 Watt Halogen scanner 15 amps on startup, Car PC 6 amps, Dash, upper and lower consoles, stereo, etc...
The blue I am using for an ignition on 12v+. It's also wired to the white terminal block, but with the relay, so when it's grounded, then the blue gets 12v+... I have various things that also need an ignition on power, so I will plug those items into it...

Image

This is the right side of the dashboard, just before AC vent....

More wiring work... it's kinda rainy here in Tampa Bay FL...

Rafael

User avatar
RafaelLOJ
Operative
Posts: 150
Joined: Thu Jun 26, 2008 10:25 am

Re: Wiring... Oh what fun! :)

Post by RafaelLOJ » Tue Dec 30, 2014 9:28 pm

More toys...
What is this?
A low voltage relay (4 actually, all on one board)...
A Red LED outdoor light (3 1watt LED's) I got off ebay for $10...

Image

My car is a factory stick shift car, so it has a shift light (well, it did, it use to be on the dash).
I have an EBL P4 Flash, so I can tune the ECM and change the shift light to what ever RPM I want...
The output from the ECM is 260mA.... So I'll run it to the low voltage trigger (and I have a few other things I'm hooking up from the Viper Alarm too)...

My 91 Formula has the power bulge hood... Originally it came with a block off plate... I purchased an actual screen from an 82-84 TA and had it chromed... So when all done, the RED Led light will shine out from the hind the chrome mesh :) (and black hood / car of course ) :)

Hopefully it's not rainy tomorrow, I can only do so much in the garage without pulling the car outside...

User avatar
RafaelLOJ
Operative
Posts: 150
Joined: Thu Jun 26, 2008 10:25 am

Re: Wiring... Oh what fun! :)

Post by RafaelLOJ » Thu Jan 01, 2015 4:16 pm

More work on the lower console... (Red / White / Green / Red buttons & keypad)
It's 3/4th wired up!
Previously I did all the wiring to just light it...
Today, I ran a parallel circuit to ground all the buttons when pressed / on...
The only wires needed now are the wires for the actual things, parking lights, fog lights, headlights, etc..

I put a terminal on the bottom corner, which I used to connect to all the buttons...

Image

User avatar
RafaelLOJ
Operative
Posts: 150
Joined: Thu Jun 26, 2008 10:25 am

Re: Wiring... Oh what fun! :)

Post by RafaelLOJ » Tue Jan 06, 2015 7:50 pm

Windows....
The GM Buttons for the Window up/down are like mini relays. They can connect a bit of power, but seems like not enough, since everyone always complains about how slow they are, even with new motors...
Your KR button will probably fry if you try to wire it up to the wires the buttons uses...
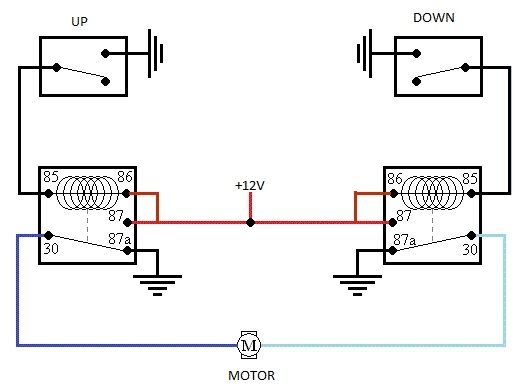
You need to use relays... 2 per window, 4 total...

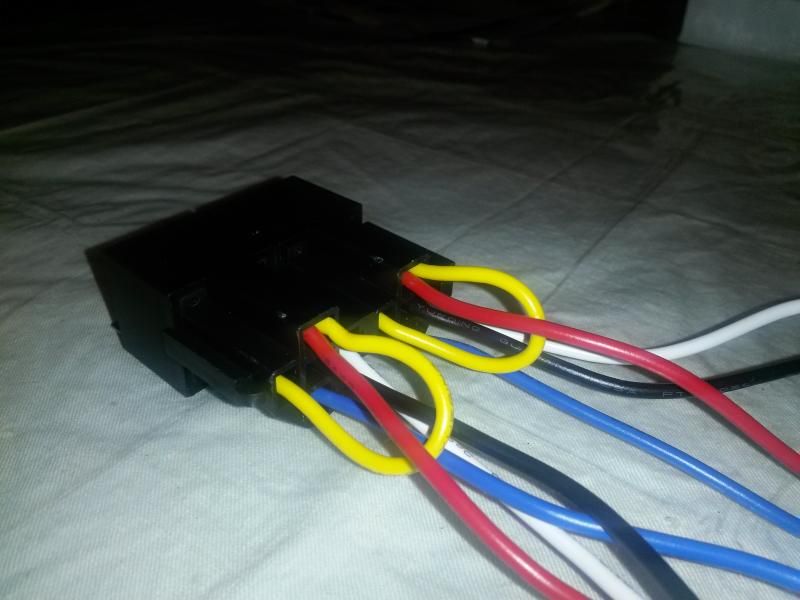
Relays:
Image

I bought a pack of 10 prewired relays & harnesses from Amazon for $21. They even interconnect! These have good strong connections to the relay and 16 gauge wire out... Now I used a small screw driver and took out and rearranged the wires (to put the colors where I wanted, to help me remember / understand). the other thing I did, I cut the Yellow wire, and connected it to the Red wire, so that 1 side of the relay is energized, and when I ground the button (up or down) it energizes and the window opens or closes...

Diagram:
Image

Diagram modified from one posted by 92RS_Ttop on Thirdgen.org, he was using 12v+ for the switches, I rearranged the wires so it's grounded instead...

This should also speed up your windows since the relay can allow more power to transfer vs the GM factory switch...

User avatar
RafaelLOJ
Operative
Posts: 150
Joined: Thu Jun 26, 2008 10:25 am

Re: Wiring... Oh what fun! :)

Post by RafaelLOJ » Wed Jan 07, 2015 5:36 pm

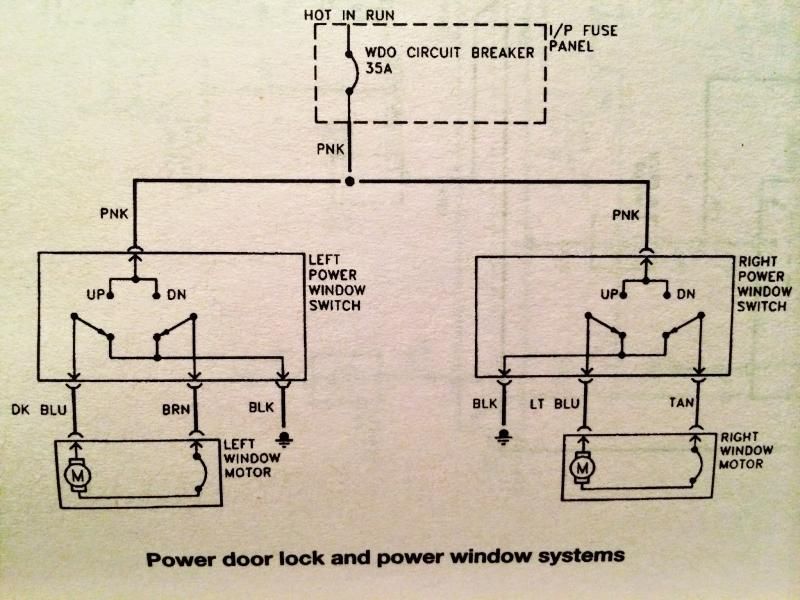
Here is a very basic break down of the factory window switches and wires....

Image
Pic originally from Jagu07 on www.thirdgen.org

Basically, the black is ground, the Pink (red) is positive...
Then the Blue's on each switch are up and the brown's are down...

With the previous relay diagram and this, you should be set...

User avatar
RafaelLOJ
Operative
Posts: 150
Joined: Thu Jun 26, 2008 10:25 am

Re: Wiring... Oh what fun! :)

Post by RafaelLOJ » Sun Jan 18, 2015 5:49 pm

Pimpin & Crimpin Sunday!

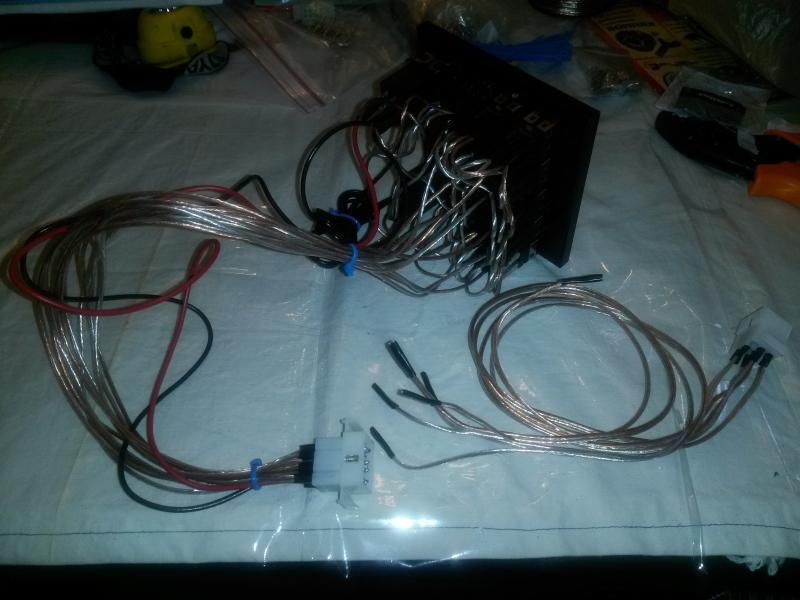
I needed some Molex connectors... so you can easily connect / disconnect stuff...
Went to Radio Shack... Would of been about $30 in connectors... they had a "Buy 10 Parts, get 50% off" and I signed up for something and got and additional $5 off, walked out with 10 Molex plugs for less than $12! (4 12 pin, 2 9 pin, 2 6 pin, 2 2pin)....

Lower Center console done!
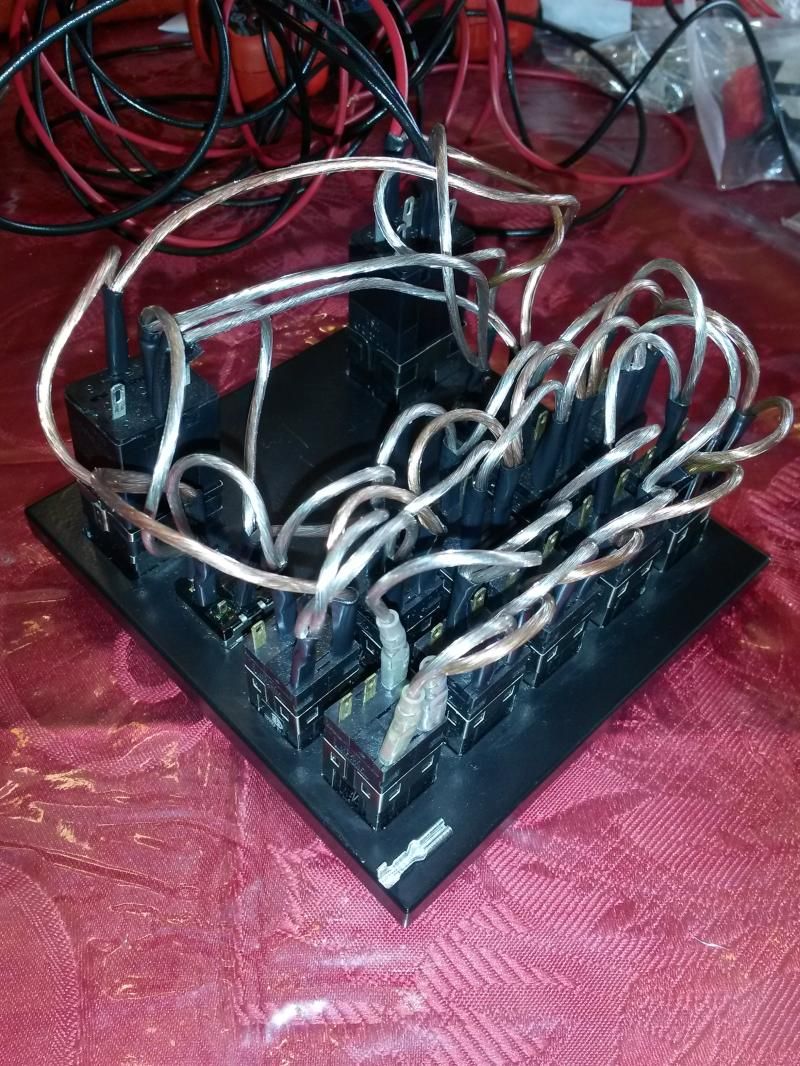
14 buttons, each has 4 terminals (2 for + and - for light) and 2 for what ever function they will do...
The 2 Window switches have 5 terminals, 2 for lights, 1 ground, 1 up & 1 down...
That's about 58 different connections in an area that's about 5x5 inches... I'm tired...

Image

The harness on the bottom right is for the Windows up / down and the ignition / crank... (ready to connect)
Next is making a housing for this and then get it on the center console...

User avatar
RafaelLOJ
Operative
Posts: 150
Joined: Thu Jun 26, 2008 10:25 am

Re: Wiring... Oh what fun! :)

Post by RafaelLOJ » Sun Feb 08, 2015 11:46 am

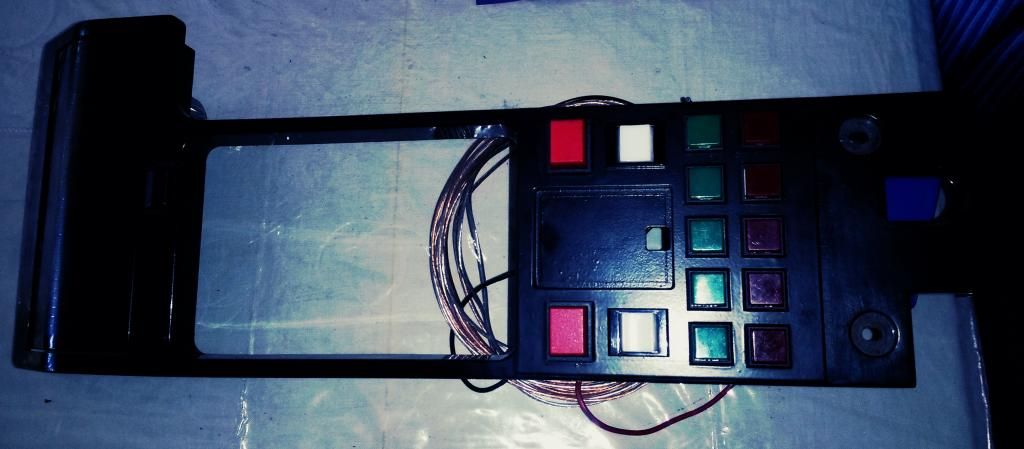
Cut the hole in my console plate... all looks good... I have a 91 console (not the original Kitt 82 style) and I did this for a few reasons... my car is a 5 speed and I need my emergency brake, so I decided to skip the whole fiberglass lower console, and do my own thing... I was thinking of making an angled box, but this will fit (tight) and now I can keep getting more wiring done...

Image

Post Reply